Thursday, 18 October 2012

Anonymous Access to post comment on Blog SubSite in sharepoint 2010

When we build an internet-facing website using SharePoint, the first question that arises is the accessibility of this site to anonymous users. SharePoint takes care of this feature too, the only thing we need to do is enable the anonymous access to our site.

How do we enable anonymous access?
Enabling anonymous access has two stages. First, this has to be enabled in Central Administration for the respective Web-Application. Then it has to be set for the respective Site (site collection).
Navigate to the central administration page.
Click on Application Management ->Manage Web Applications. Select the web application and click on ‘Authentication providers’


A pop-up window opens, from which you need to select your authentication provider as shown in the image below. Click on ‘Default’

This opens up the edit window of the selected authentication provider. In this window CHECK the “Enable Anonymous Access” field and click on ‘Save’


The above process sets anonymous access at CA level. We still have to set the anonymous access for a single site-collection or for a root site.

Enabling Anonymous Access for a Site
Go to the respective site, for which anonymous access has to be enabled.
Navigate to Sites->Site Permissions. You will notice a new option ‘Anonymous Access’ in the ribbon.


Click on Anonymous Access and select the required option. Selecting ‘Entire Web site’ gives read-only permissions to all users who visit the site.


The process described above is how we enable Read-Only access to anonymous users. But there are also few scenarios where we need to give limited Write/Edit permissions to anonymous users.
For example, when we create a blog site in SharePoint we need to give permissions for all users to add comments to the (published) posts.

(**Note: A SharePoint blog site has three lists – Categories, Posts and Comments—which are created by default. Categories and Posts can be ‘Read only’ lists. But when Comments are taken into consideration, we need to allow anonymous users to write/enter their comments.)

Enabling Anonymous Users to Add Comments to Blog Posts

Navigate to your blog site. Click on, Sites->Site Settings. There in the left menu bar find all the available lists in the blog site. Select ‘Comments’


Now all the available comments will be shown.
In the ribbon select, List Tools->List->List Permissions


Here, we can set permissions for anonymous users to add comments by stopping ‘Inherit permissions’ and giving permissions exclusively for this list. Click on ‘Stop Inheriting Permissions’, this stops inheriting permission from parent site.


When we stop inheriting permissions from parent site, ‘Anonymous Access’ appears in the ribbon menu. Click on this and select ‘Add Items- Add items to lists’

You are done and any user can add comments to your blog posts!!!
But wait, this may not work in cases where BLOG is set as a sub site under a publishing site.
This is because site collection is based on publishing portal and have a ‘ViewFromPagesLockdown’ feature. This feature prevents anonymous users from gaining access to certain areas of site. So, first check if ‘ViewFromPagesLockdown’ feature is enabled for the site.

To determine if a site has ‘ViewFromPagesLockdown’ enabled run the following in Powershell:

get-spfeature -site http://sitecollectionURL

If ViewFormPagesLockDown is listed, it’s enabled.
To toggle lockdown mode to off:

$lockdown = get-spfeature viewformpageslockdown
disable-spfeature $lockdown -url

Now re-set the anonymous access and try to add comments to a blog post without signing in. You can add comments!!!!




Thursday, 27 September 2012

Compare DateTime in XSLT

<xsl:template name="Webinar" match="Row[@Style='Webinar']" mode="itemstyle">
      
        
         <xsl:variable name="ACEndDate">
             <xsl:value-of select="ddwrt:FormatDateTime(@ToDate, 2057, 'yyyyMMddhhmmss')"/>
         </xsl:variable>
  
             <xsl:variable name="CurrentDate">
      <xsl:value-of select="ddwrt:FormatDateTime(string(ddwrt:Today()), 2057, 'yyyyMMddhhmmss')"/>
       </xsl:variable>     
          
    <xsl:if test="$CurrentDate &lt; $ACEndDate">
      
/////// do here for your data

    </xsl:if>         
    
 </xsl:template>

Monday, 3 September 2012

SP Services (GetListItems , UpdateListItems )


var cid = JSRequest.QueryString["ID"];

<script type="text/javascript" src="../js/jquery-1.4.2.min.js" ></script>
<script type="text/javascript" src="../js/jquery.SPServices-0.6.2.min.js" ></script>

<a href="javascript:void(0);"  onclick="javascript:GetListItems('3');" id="href1" >
Get List Item by Id</a>

<a href="javascript:void(0);"  onclick="javascript:CreateNewItem($('#txtdn').val());" id="href2" >
Insert New Item</a><br/>
     
 <script type="text/javascript">
----------------Get list item-------------------
 function GetListItems(ID)
{
 var CamlQuery = "<Query><Where><Eq><FieldRef Name='ID'/><Value Type='Counter'>" + ID + "</Value></Eq></Where></Query>";
         var CamlViewFields = "<ViewFields><FieldRef Name='ID' /><FieldRef Name='Title' /></ViewFields>";
         // this let me know that the function is getting called and passed the correct parameter value
         alert('function called and passed last ID of : ' + ID);

$().SPServices({
   operation: "GetListItems",
   async: false,
   listName: "DomainName",
   CAMLViewFields: CamlViewFields,
   CAMLQuery: CamlQuery,
     completefunc: function (xData, Status) {
       $(xData.responseXML).find("[nodeName='z:row']").each(function() {

       // just load a new variable with the returned value      
       var thisID = $(this).attr("ows_Title");
       alert(thisID);

     });
   }
         });
       }
 ---------------- //Add new item in list--------------
 
   function CreateNewItem(title) {
   alert(title);
    $().SPServices({
        operation: "UpdateListItems",
        async: false,
        batchCmd: "New",
        listName: "DomainName",
        valuepairs: [["Title", title]],
        completefunc: function(xData, Status) {
          alert("completed");
        }
    });
}

---------------- //Update new item in list--------------

</script>


How to hide Sharepoint 2010 ListItem fields in pages


Hide Sharepoint 2010 ListItem fields in pages

Add a link to Latest version of J Query to  your page and add this script.

<script type="text/javascript" language="javascript">
        $(document).ready(function() {
            $("nobr:contains('My Field To Hide')").
      parent('h3').parent('td').parent('tr').hide();
        });
 
    </script>

where "My Field To Hide"  is the field name displayed in the form.

Converting Word Documents to PDF using SharePoint Server 2010 and Word Services

SharePoint 2010 Word Automation Services available with SharePoint Server 2010 supports converting Word documents to other formats. This includes PDF. This article describes using a document library list item event receiver to call Word Automation Services to convert Word documents to PDF when they are added to the list. The event receiver checks whether the list item added is a Word document. If so, it creates a conversion job to create a PDF version of the Word document and pushes the conversion job to the Word Automation Services conversion job queue.
Code It
This article describes the following steps to show how to call the Word Automation Services to convert a document:
  1. Creating a SharePoint 2010 list definition application solution in Visual Studio 2010.
  2. Adding a reference to the Microsoft.Office.Word.Server assembly.
  3. Adding an event receiver.
  4. Adding the sample code to the solution.
Creating a SharePoint 2010 List Definition Application in Visual Studio 2010
This article uses a SharePoint 2010 list definition application for the sample code.

To create a SharePoint 2010 list definition application in Visual Studio 2010

  1. Start Microsoft Visual Studio 2010 as an administrator.
  2. From the File Menu, point to the Project menu and then click New.
  3. In the New Project dialog box select the Visual C# SharePoint 2010 template type in the Project Templates pane.
  4. Select List Definition in the Templates pane.
  5. Name the project and solution ConvertWordToPDF.


    Figure 1. Creating the Solution

    Creating the solution
  6. To create the solution, click OK.
  7. Select a site to use for debugging and deployment.
  8. Select the site to use for debugging and the trust level for the SharePoint solution.
    note Note:
    Make sure to select the trust level Deploy as a farm solution. If you deploy as a sandboxed solution, it does not work because the solution uses the Microsoft.Office.Word.Server assembly. This assembly does not allow for calls from partially trusted callers.


    Figure 2. Selecting the trust level

    Creating the solution
  9. To finish creating the solution, click Finish.
Adding a Reference to the Microsoft Office Word Server Assembly
To use Word Automation Services, you must add a reference to the Microsoft.Office.Word.Server to the solution.

To add a reference to the Microsoft Office Word Server Assembly

  1. In Visual Studio, from the Project menu, select Add Reference.
  2. Locate the assembly. By using the Browse tab, locate the assembly. The Microsoft.Office.Word.Server assembly is located in the SharePoint 2010 ISAPI folder. This is usually located at C:\Program Files\Common Files\Microsoft Shared\Web Server Extensions\14\ISAPI. After the assembly is located, click OK to add the reference.


    Figure 3. Adding the Reference

    Adding the reference
Adding an Event Receiver
This article uses an event receiver that uses the Microsoft.Office.Word.Server assembly to create document conversion jobs and add them to the Word Automation Services conversion job queue.

To add an event receiver

  1. In Visual Studio, on the Project menu, click Add New Item.
  2. In the Add New Item dialog box, in the Project Templates pane, click the Visual C# SharePoint 2010 template.
  3. In the Templates pane, click Event Receiver.
  4. Name the event receiver ConvertWordToPDFEventReceiver and then click Add.


    Figure 4. Adding an Event Receiver

    Adding an event receiver
  5. The event receiver converts Word Documents after they are added to the List. Select the An item was added item from the list of events that can be handled.


    Figure 5. Choosing Event Receiver Settings

    Choosing even receiver settings
  6. Click Finish to add the event receiver to the project.
Adding the Sample Code to the Solution
Replace the contents of the ConvertWordToPDFEventReceiver.cs source file with the following code.
using System;
using System.Security.Permissions;
using Microsoft.SharePoint;
using Microsoft.SharePoint.Security;
using Microsoft.SharePoint.Utilities;
using Microsoft.SharePoint.Workflow;

using Microsoft.Office.Word.Server.Conversions;

namespace ConvertWordToPDF.ConvertWordToPDFEventReceiver
{
  /// <summary>
  /// List Item Events
  /// </summary>
  public class ConvertWordToPDFEventReceiver : SPItemEventReceiver
  {
    /// <summary>
    /// An item was added.
    /// </summary>
    public override void ItemAdded(SPItemEventProperties properties)
    {
      base.ItemAdded(properties);

      // Verify the document added is a Word document
      // before starting the conversion.
      if (properties.ListItem.Name.Contains(".docx") 
        || properties.ListItem.Name.Contains(".doc"))
      {
        //Variables used by the sample code.
        ConversionJobSettings jobSettings;
        ConversionJob pdfConversion;
        string wordFile;
        string pdfFile;

        // Initialize the conversion settings.
        jobSettings = new ConversionJobSettings();
        jobSettings.OutputFormat = SaveFormat.PDF;

        // Create the conversion job using the settings.
        pdfConversion = 
          new ConversionJob("Word Automation Services", jobSettings);

        // Set the credentials to use when running the conversion job.
        pdfConversion.UserToken = properties.Web.CurrentUser.UserToken;

        // Set the file names to use for the source Word document
        // and the destination PDF document.
        wordFile = properties.WebUrl + "/" + properties.ListItem.Url;
        if (properties.ListItem.Name.Contains(".docx"))
        {
          pdfFile = wordFile.Replace(".docx", ".pdf");
        }
        else
        {
          pdfFile = wordFile.Replace(".doc", ".pdf");
        }

        // Add the file conversion to the conversion job.
        pdfConversion.AddFile(wordFile, pdfFile);

        // Add the conversion job to the Word Automation Services 
        // conversion job queue. The conversion does not occur
        // immediately but is processed during the next run of
        // the document conversion job.
        pdfConversion.Start();

      }
    }
  }
}
Read It
Word Automation Services provided with SharePoint Server 2010 enables you to create server-based document solutions. Combining the functionality that is provided by Word Automation Services with the document content manipulation support provided with the Open XML SDK enables you to create rich document solutions that execute on the server that do not require Automation of the Word client application.
Examples of the kinds of operations supported by Word Automation Services are as follows:
  • Converting between document formats (e.g. DOC to DOCX)
  • Converting to fixed formats (e.g. PDF or XPS)
  • Updating fields
  • Importing "alternate format chunks"
This article contains sample code that shows how to create a SharePoint list event handler that can create Word Automation Services conversion jobs in response to Word documents being added to the list. This section uses code examples taken from the complete, working sample code provided earlier in this article to describe the approach taken by this article.
The ItemAdded event handler in the list event handler first verifies that the item added to the document library list is a Word document by checking the name of the document for the .doc or .docx file name extension.
// Verify the document added is a Word document
// before starting the conversion.
if (properties.ListItem.Name.Contains(".docx") 
    || properties.ListItem.Name.Contains(".doc"))
{
If the item is a Word document then the code creates and initializes ConversionJobSettings and ConversionJob objects to convert the document to the PDF format.
//Variables used by the sample code.
ConversionJobSettings jobSettings;
ConversionJob pdfConversion;
string wordFile;
string pdfFile;

// Initialize the conversion settings.
jobSettings = new ConversionJobSettings();
jobSettings.OutputFormat = SaveFormat.PDF;

// Create the conversion job using the settings.
pdfConversion = 
  new ConversionJob("Word Automation Services", jobSettings);

// Set the credentials to use when running the conversion job.
pdfConversion.UserToken = properties.Web.CurrentUser.UserToken;
The Word document to be converted and the name of the PDF document to be created are added to the ConversionJob.
// Set the file names to use for the source Word document
// and the destination PDF document.
wordFile = properties.WebUrl + "/" + properties.ListItem.Url;
if (properties.ListItem.Name.Contains(".docx"))
{
  pdfFile = wordFile.Replace(".docx", ".pdf");
}
else
{
  pdfFile = wordFile.Replace(".doc", ".pdf");
}

// Add the file conversion to the Conversion Job.
pdfConversion.AddFile(wordFile, pdfFile);

Finally the ConversionJob is added to the Word Automation Services conversion job queue.
// Add the conversion job to the Word Automation Services 
// conversion job queue. The conversion does not occur
// immediately but is processed during the next run of
// the document conversion job.
pdfConversion.Start();

The solution cannot be removed when a job is scheduled or running

The solution cannot be removed when a job is scheduled or running
Cancel Deployment when a error is occured like
The solution cannot be removed when a job is scheduled or running


Open command prompt and enumerate the running deployments by executing this command:
stsadm -o enumdeployments
then iisreset
Now, we obtain the jobid and cancel this deployement as follows:
stsadm -o canceldeployment -id 2529c788-971c-46a3-b69f-a2a0a1fcc851
That's it. We can then retract and delete the solution.

Auto populate current logged in user name in SharePoint 2010 People Picker control

Follow the steps below to Auto populate current logged in user name in SharePoint 2010 People Picker control:

1) Create a scripts library in your site (or use the one you currently use to store your Javascript/*.js files)


2) Download the latest version of the JQuery file from here - http://code.jquery.com/jquery-1.5.1.min.js


3) Dowload the latest version of the SPServices JQuery library from here - 


http://spservices.codeplex.com or http://spservices.codeplex.com/releases/55660/download/171214
4) Copy the above *.js files (namely "jquery-1.5.1.min.js" and "") to the scripts folder created in Step 1
5) Open the form/page (such as NewForm.aspx) where you want to default the People Picker control to the current user logged in and add the following script at the end of the page (preferably below the end style tag:


<script language="javascript" type="text/javascript" src="/board/scripts/jquery-1.5.1.min.js"></script>
<script language="javascript" type="text/javascript" src="/board/scripts/jquery.SPServices-0.6.0.min.js"></script>


<script language="javascript" type="text/javascript">
$(document).ready(function() {
 var userName = $().SPServices.SPGetCurrentUser({
  fieldName: "Name"
 });
 $("textarea[title='People Picker']").val(userName);
 $("div[title='People Picker']").text(userName);
});
</script>

Cascading dropdowns in Sharepoint 2010

Cascading dropdowns in Sharepoint 2010

Hi All,

How many times you require functionality where in based on the selection of parent drop down generates the values to the child drop down. Examples, selection of country fills the states drop down.

Well, of course there is a way like creating custom field which can definitely achieve this job. However this requires us to write down the code and .ascx custom fields and deploy on the server to get it to the action.

We can achieve the same with the help of jQuery. Yes, no files and no code. Without them we can achieve this. So why to wait? Let’s explore more in this.

Before we start the exam, you will need to fantastic jQuery from 

jQuery 1.3.2.min.js

and SPServices jQuery from 

SPServices jQuery

Once you download these two .js files, upload them to any of the document library where you have the permission over the site.

Now go ahead and create one list. I am calling it a CategoryType and adding two values in the list.


Now I am creating one more list and call it as a CategoryRelationList and create one column called Category which is a look up column to the CategoryType title column and add few items.


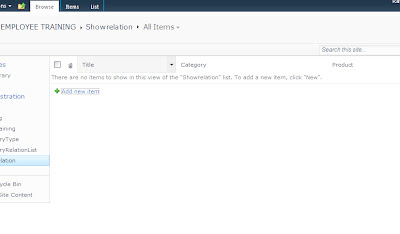
And now to put it in action, we will create one more list and we call it RequestForm and create two columns, Category look up to CategoryType list title column and Product look up column to the CategoryRelationList title column. This is the list where we will use the cascading drop down service from SPServices jquery library


Now here comes a good part. Now you have two ways to achieve this, the simplest which I believe is by using Content editor web part on both new form and edit form. Add content editor web part and add following lines to it. (Check your document library path in src attribute where you have kept two js files which we downloaded earlier)
<script language="javascript" type="text/javascript" src=" /Shared%20Documents/jquery-1.3.2.min.js"></script>

<script language="javascript" type="text/javascript" src=" /Shared%20Documents/jquery.SPServices-0.5.6.min.js"></script>
<script language="javascript" type="text/javascript">

$(document).ready(function() {
$().SPServices.SPCascadeDropdowns({
relationshipList: "CategoryRelationList",
relationshipListParentColumn: "Category",
relationshipListChildColumn: "Title",
parentColumn: "Category",
childColumn: "Product",
debug: true
});

});
</script>


OR the other way to achieve this is open SharePoint designer and then open site where this list is located, open NewForm.aspx, check out the form and find the following line.

<asp:Content ContentPlaceHolderId="PlaceHolderMain" runat="server">

Add the above script exactly below this. Save it and check in. This will also do the job for you. Do the same for edit form as well. 

Now let me explain each parameter in the script.

relationshipList – This is the name of the list where we have kept the relationship.
relationshipListParentColumn – This is the parent column in the relationship list.
relationshipListChildColumn – This is the child column in the relationship list.
parentColumn – parent column in the list where we want to implement this.
childColumn – child column in the list where we want to implement this.

Now see it in action. Open the list and click on new and see the magic.

Thanks

Add,Deploy and retract Sharepoint solutions programmatically

Deploy and retract Sharepoint solutions programmatically

The below is the sample code for the adding the Sharepoint solution to the solutionmanagement store and deploying the solution locally.

try
{
SPSolution solution = SPFarm.Local.Solutions.Add(wspOutputFile);
Collection selectedWebApps = new Collection();
SPWebApplication webApp = SPWebApplication.Lookup(new Uri("http://localhost"));
selectedWebApps.Add(webApp);

solution.DeployLocal(true, true);
}
catch{}

You need to add the assemblies Microsoft.SharePoint.Administration and System.Collections.ObjectModel at the beginning of the code. To deploy the solution to other web applications, you can add them each after the selectedWebApps.Add(webApp); step.


The below is the code to retract the solution from the solution management store.

try
{
SPSolution solution = SPFarm.Local.Solutions[wspName];
solution.RetractLocal();
SPFarm.Local.Solutions.Remove(wspName);
}
catch{}

In the above code, wspName variable contains the name of your WSP solution with the extension.

Happy Coding!

Custom Date Formats in SharePoint XSL

There are quite a few posts out there on this topic, but I’m yet to find one comprehensive post that walks through this beginning to end and actually works.  Let’s give it a go.
A very common scenario for SharePoint publishing sites is to customize the look to suit the customers needs.  Usually this is done with a Content Query Web Part and some custom XSL.  When doing this very often you need to display a date.  You will quickly notice that just displaying the date that SharePoint gives you is not going to be sufficient.  If you just did the standard
<xsl:value-of select="@ArticleStartDate"/>
You get back a pretty nasty looking result
2009-03-23 00:00:00
However if you use the “FormatDate” function, you can make this look a lot better.
<xsl:value-of select="ddwrt:FormatDate(@ArticleStartDate, 2057, 3)"/>
Results in this
23 March 2009
All you need to do to make sure the “FormatDate” function is available in your custom XSL files is to make sure you reference the ddwrt namespace.
xmlns:ddwrt="http://schemas.microsoft.com/WebParts/v2/DataView/runtime
Once this has been added to the rest of your namespace declarations at the top of your <xsl:stylesheet> tag, you should be able to use the “FormatDate” function anywhere you like.  Here is sample of what a full XSL file would look like that does this.
<xsl:stylesheet 
  version="1.0" 
  exclude-result-prefixes="x d xsl msxsl cmswrt"
  xmlns:x="http://www.w3.org/2001/XMLSchema" 
  xmlns:d="http://schemas.microsoft.com/sharepoint/dsp" 
  xmlns:cmswrt="http://schemas.microsoft.com/WebParts/v3/Publishing/runtime"
  xmlns:xsl="http://www.w3.org/1999/XSL/Transform" xmlns:msxsl="urn:schemas-microsoft-com:xslt"
  xmlns:ddwrt="http://schemas.microsoft.com/WebParts/v2/DataView/runtime">
    
    <xsl:template name="Default" match="*" mode="itemstyle">
 <xsl:value-of select="ddwrt:FormatDate(@ArticleStartDate, 2057, 3)"/>   
    </xsl:template>
   
</xsl:stylesheet>
Here are the details on the different formats you can get by changing the parameters.  March 23 12:00 AM was used as input for all outputs.
OutputLocaleFormat
3/23/200910331
3/23/2009 12:00 AM10332
Monday, March 23 200910333
12:00 AM10334
Monday, March 23, 2009 12:00 AM10337
3/23/2009 12:00:00 AM103313
Monday, March 23, 2009 12:00:00 AM103315
23/03/200920571
3/23/2009 12:00 AM20572
23 March 200920573
00:0020574
23/03/2009 00:0020575
23 March 2009 00:0020577
00:00:00205712
23/03/2009 00:00:00205713
23 March 2009 00:00:00205715
You can also get a list of all the available locale’s here.

To close a dialog box from code behind you can use

To close a dialog box from code behind you can use
 
this.Page.Response.Clear();

        if (succes)
        {
            this.Page.Response.Write("<script type=\"text/javascript\">window.frameElement.commonModalDialogClose(1, 'saved');</script>");
        }
        else
        {
            this.Page.Response.Write("<script type=\"text/javascript\">window.frameElement.commonModalDialogClose(0, 'cancelled');</script>");
        }

        this.Page.Response.End();